
This blank design sheet is used for drawing the outline of your bowl. This sheet is big enough to design a bowl 12" diameter by 12 ring levels tall. Each row, 1 through 12, corresponds with a ring level of your bowl design. The grids on the sheet are intended to be 1" wide by 3/4" tall to make it easy to measure bowl ring dimensions directly from the sheet. But, I found that every printer seems to print the grids at different sizes. So, I suggest printing out one sheet then using a photocopy machine to enlarge the sheet to full 1" grid width.
Draw the right-hand half outline of the new bowl on the Figure 1 sheet. This is the first step in the design process. If you want to see what the whole outline looks like, hold the left side of the sheet against a mirror so you can see the reflection of the sheet. The entire outline can then be viewed. This design has 9 rings. The bottom ring will be a solid disk. The other 8 rings will be segmented. I have decided to make the top, middle, and bottom rings from purpleheart and the rest of the rings from maple. The bowl will be made from 3/4" thick kiln-dried lumber, purchased from a local lumberyard.
Draw the inner surface outline of the new bowl on the Figure 1 sheet using 1/2" wall thickness. The 1/2" wall thickness does not mean I'm going to turn the bowl to 1/2" thickness. The 1/2" is just a reasonably safe design thickness. You can turn your bowl thinner. On the other hand, if you don't make your segmented rings very accurately and they end up egg-shaped or the wrong diameter, then 1/2" might not be big enough. We'll take our chances on this one because I'm using a really accurate mitering sled (the one I designed on another webpage click here).
I have drawn the inner and outer ring radius lines for each ring on the Figure 1 sheet. The Segmented Ring Maker App uses the inner and outer ring diameters and the number of segments per ring.
On the Figure 1 sheet, measure and record all the inner and outer ring diameter dimensions for use with the Segmented Ring Maker App.
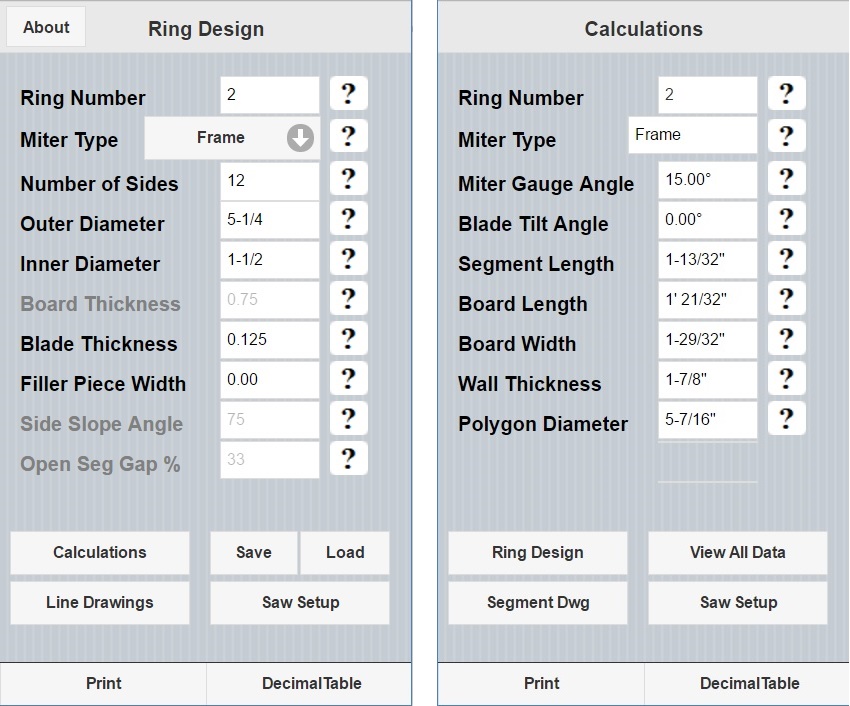
Design Step #5 - Ring #2
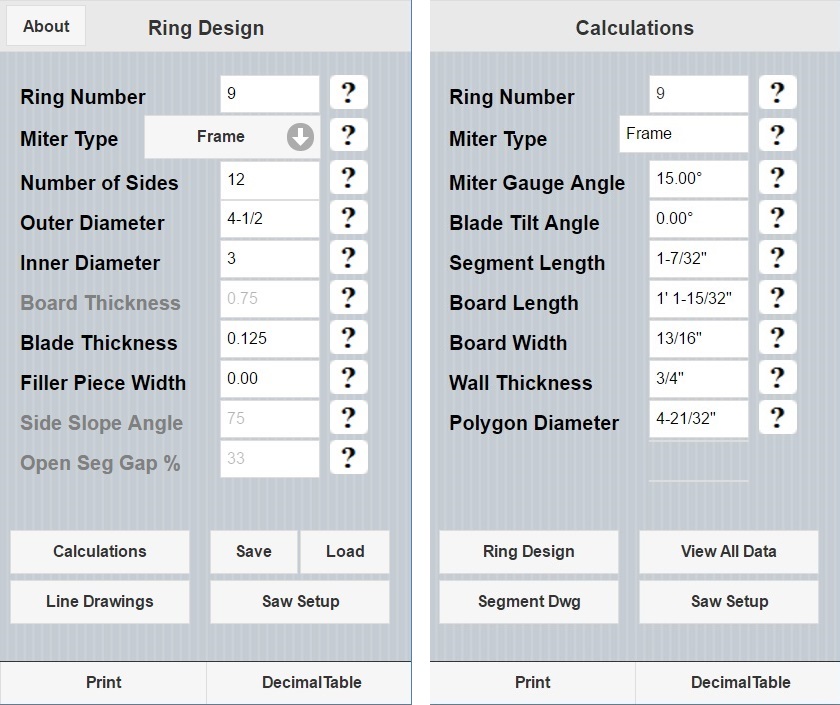
Fill in the "Ring Design" screen of the Segmented Ring Maker
App for Ring #2 segmented ring, like on the screen print at left: Ring
Number = 2, Miter Type = Frame, Number of Sides = 12, Outer Diameter =
5-1/4, Inner Diameter = 1-1/2, Blade Thickness = .125 or 1/8, Filler
Piece Width = 0. The greyed out (uneditable) boxes are not used for
Frame Miters. The greyed out boxes are used for other types of miters,
but not Frame Miters.
Click the Calculate button on the "Ring Design" screen and the
"Calculations" screen will appear, like the screen print at left. The
"Calculations" screen will have all the calculated dimensions necessary
for
cutting the Ring #2 segments.
Print the "Calculations" screen.
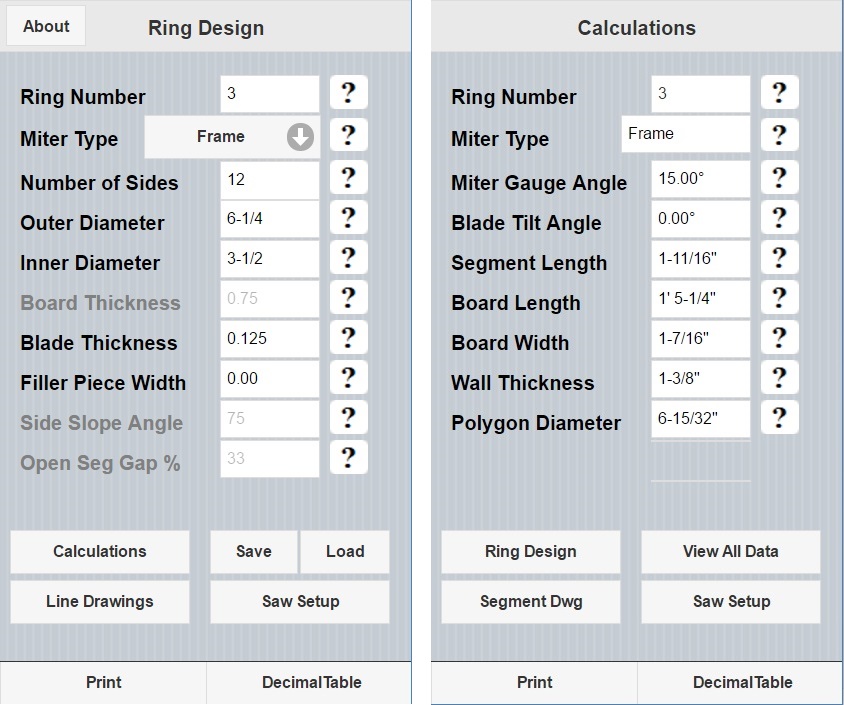
Fill in the "Ring Design" screen of the Segmented Ring Maker App for Ring #3 segmented ring and click the Calculate button.
Print the "Calculations" screen.
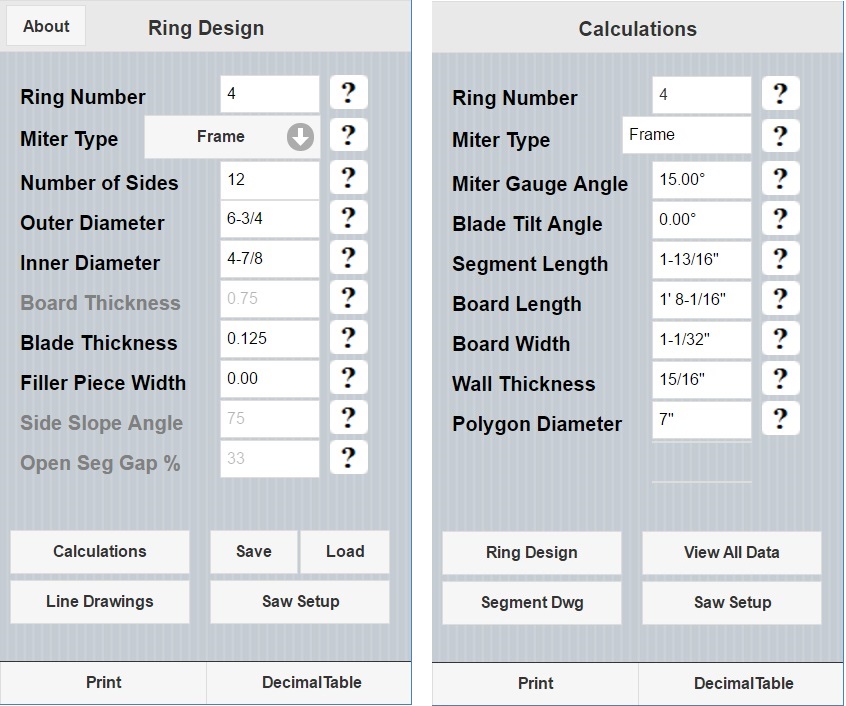
Fill in the "Ring Design" screen of the Segmented Ring Maker App for Ring #4 segmented ring and click the Calculate button.
Print the "Calculations" screen.
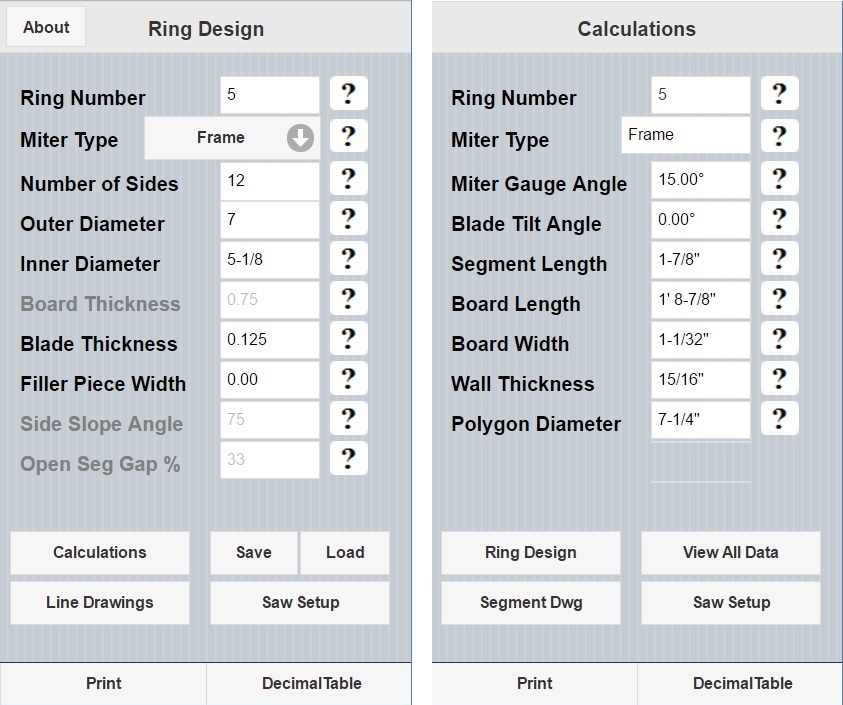
Fill in the "Ring Design" screen of the Segmented Ring Maker App for Ring #5 segmented ring and click the Calculate button.
Print the "Calculations" screen
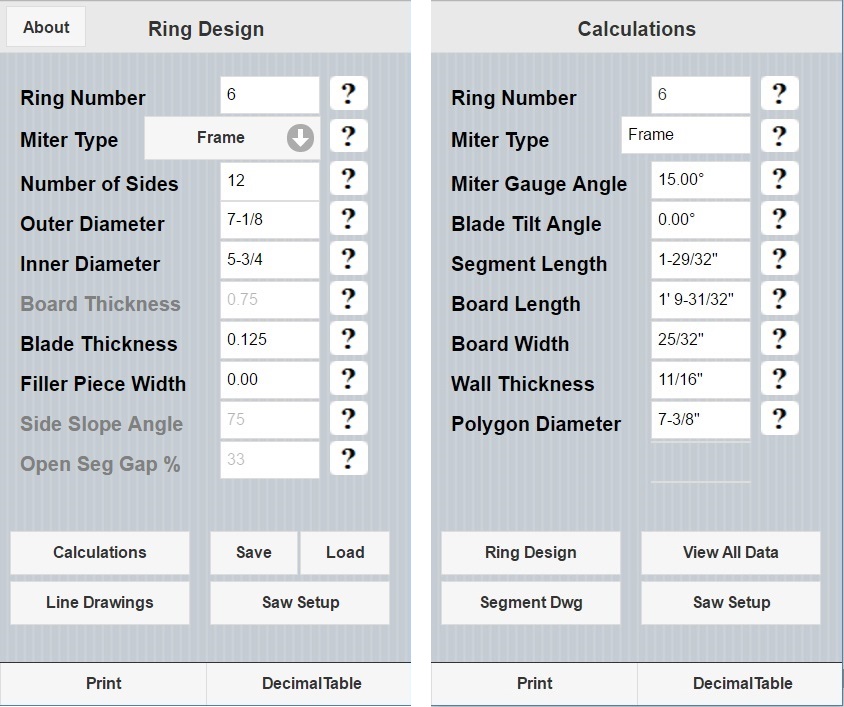
Fill in the "Ring Design" screen of the Segmented Ring Maker App for Ring #6 segmented ring and click the Calculate button.
Print the "Calculations" screen
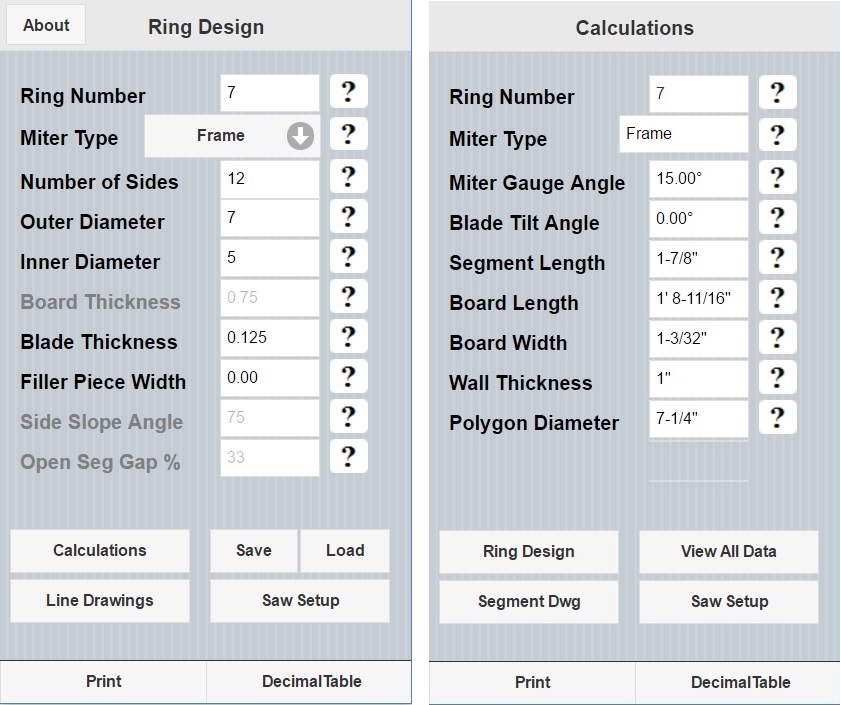
Fill in the "Ring Design" screen of the Segmented Ring Maker App for Ring #7 segmented ring and click the Calculate button.
Print the "Calculations" screen
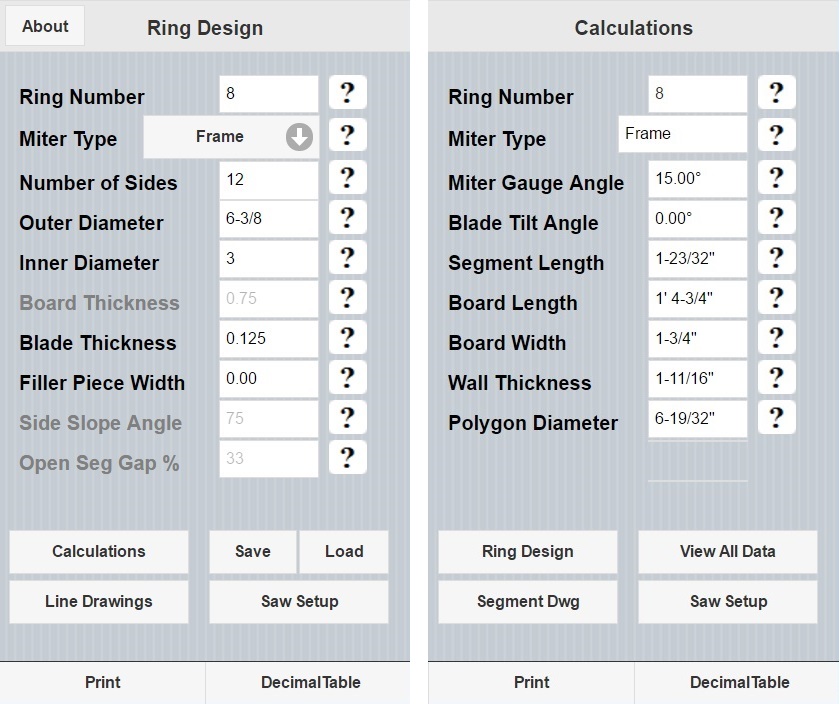
Fill in the "Ring Design" screen of the Segmented Ring Maker App for Ring #8 segmented ring and click the Calculate button.
Print the "Calculations" screen
Fill in the "Ring Design" screen of the Segmented Ring Maker App for Ring #9 segmented ring and click the Calculate button.
Print the "Calculations" screen
Now, all dimensions necessary to cut the segments for all the rings for this bowl have been calculated. I'll use these dimensions to cut boards to length and width, and then cut segments from the boards. It looks like I need about 40" of 1"x6" kiln dried maple and about 14" of 1"x4" purpleheart to make this bowl.
The next thing to do is to start cutting segments and constructing the bowl. You can get started by viewing my "Basic Frame-Miter Segmented Bowl Construction" webpage (click here).