| CUTTING
SEGMENTS: |
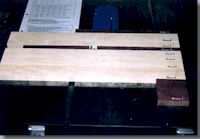
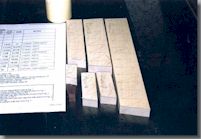
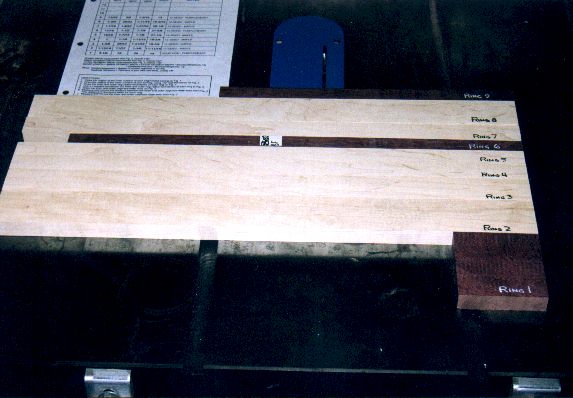
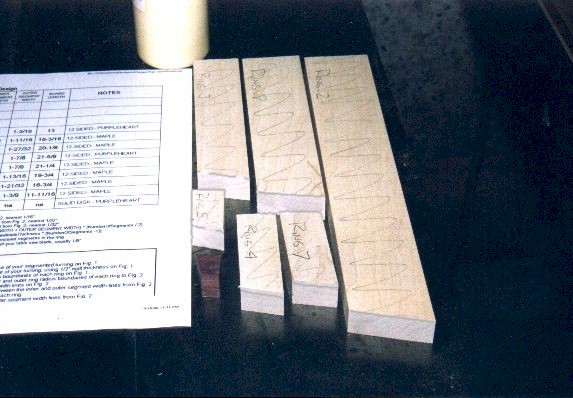
These nine maple and purpleheart boards were cut using the
filled-out "Segmented Bowl Design sheet" from my "Designing a Basic
Segmented Bowl Using a No Math Method" webpage (click here). Since maple is
cheap, I decided to save time by cutting all the maple boards the same
22" length, so there will be some maple scrap left. If I made the bowl
entirely from expensive exotic wood, I would have cut the board length
for each ring as per the Design sheet plus 1".
|
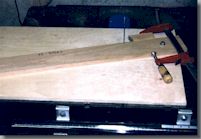
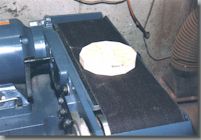
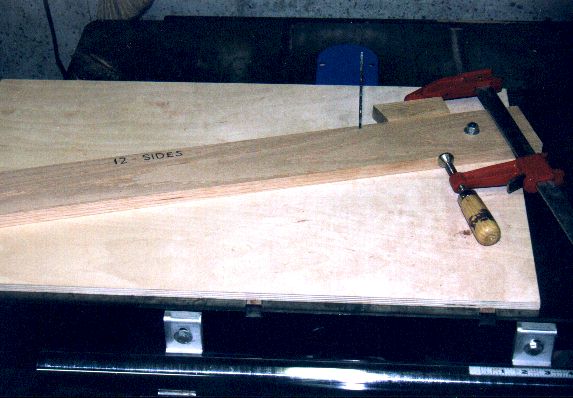
This is the frame-miter table saw sled I used to cut all the
segments for this bowl. The sled plans are found on another page on
this website (click here). Before making
any saw cuts I made sure that my table saw blade was perfectly
vertical, which is very important.
|

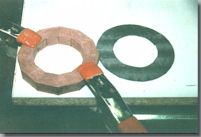
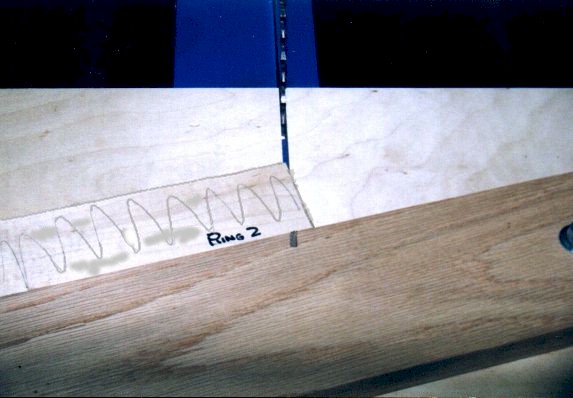
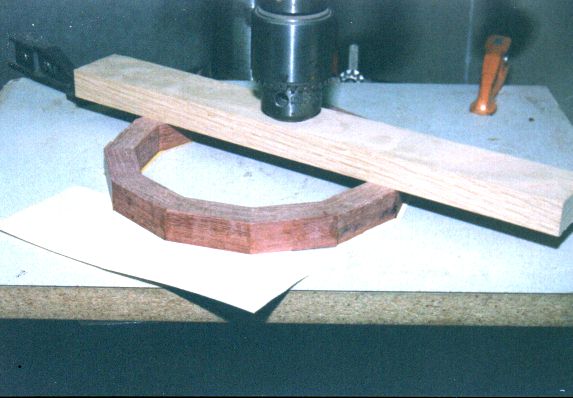
Using the #2 ring segment board as an example, the first step
construction step is to pencil mark one board face (as in the above
photo) so the segmented ring can be assembled with each segment's grain
oriented in the same direction. Before cutting segments, I fully raise
my table saw blade to keep from excessively cutting into the fence. The
next step is to cut off the end of the segment board using the miter
sled. Then, flip the segment board edge-for-edge for the next cut (and
for each successive cut). Note that during a cut, there is a tendency
for the saw blade to push the segment board to the left, making a wavy
cut. Gluing a strip of fine sandpaper to the fence edge helps hold the
board in place.
|
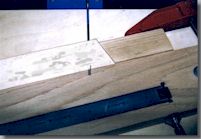
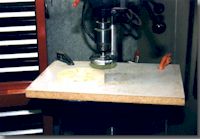
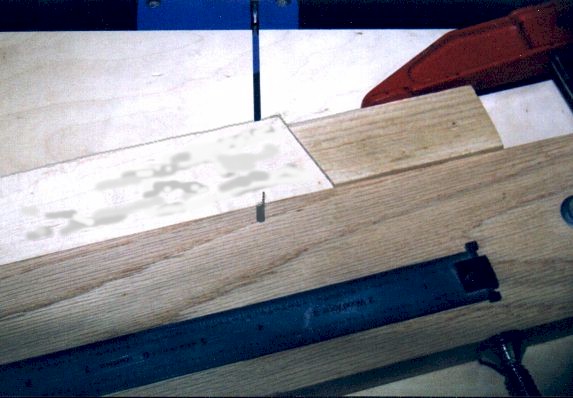
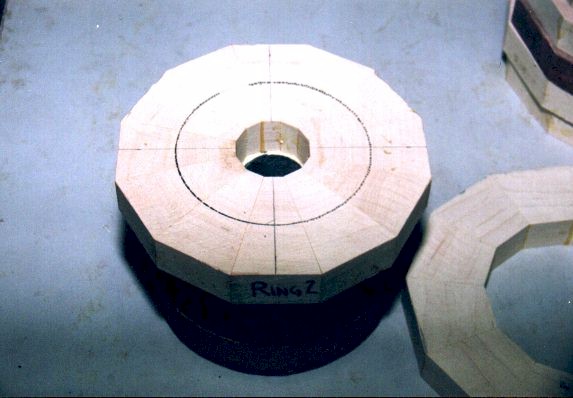
Using the Design sheet outer segment width for ring #2, mark
the 1-3/8" width dimension on the #2 ring segment board, as in the
above photo. Align the mark with the fence sawcut. Butt the stop board
against the segment board and clamp the stop board tight. Make sure
there's no chips or sawdust between the segment board and the stop
board or fence. All 12 segments can now be cut. During the cut, the
cutoff segment must be held tight against the fence and stop board. To
prevent possible kickback, hold the cutoff segment tight until the saw
blade has been fully withdrawn from the cut. Check for chips and
sawdust after every cut. If holddowns are used, they should be used on
both the segment board and cutoff segment.
|
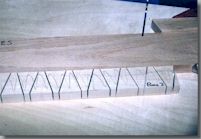
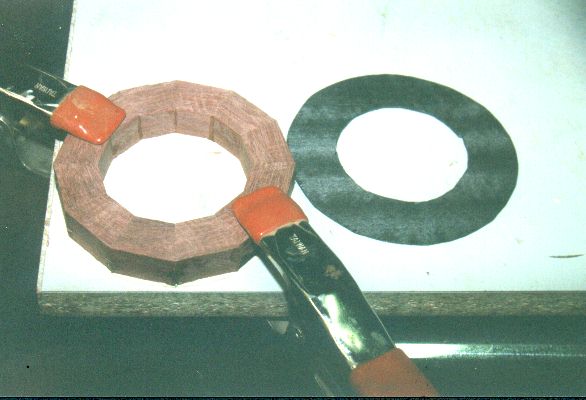
This photo shows how the the 12 segments have been
sequentially cut from the #2 ring segment board. This is not a normal
construction step. Normally, I just cut each segment board and put the
segments into individual piles. All the segment boards should be cut at
this time.
|
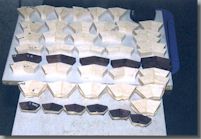
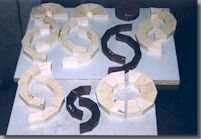
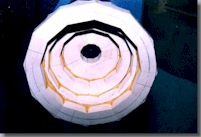
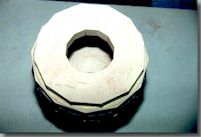
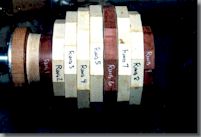
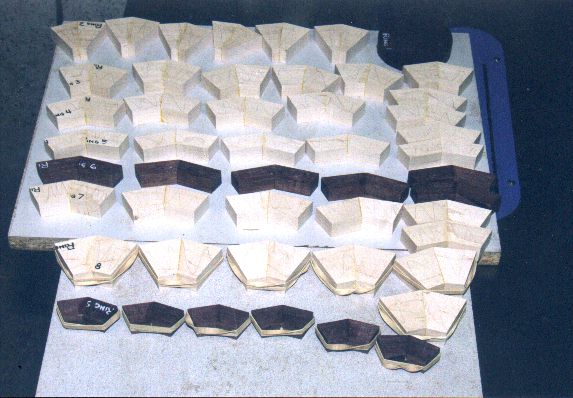
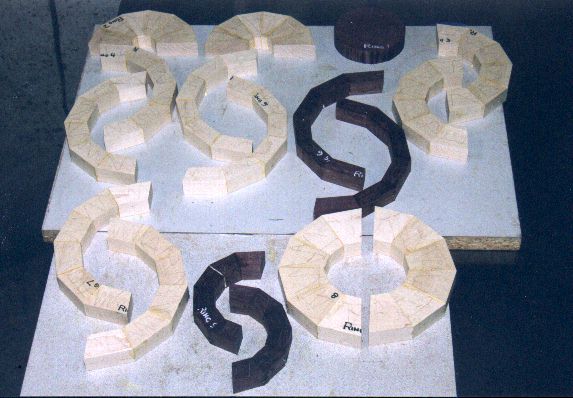
All the segments boards have been cut into segments. I have
loosely arranged each stack of segments into rings held with a rubber
band. This is not a normal construction step. Note that the pencil
marks on each segment are facing the same way (either up or down). I
normally start gluing the segments as soon as I finish cutting them.
|
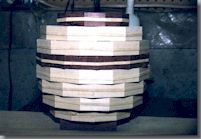
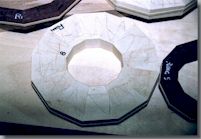
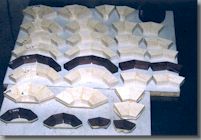
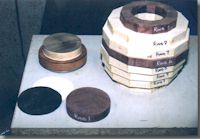
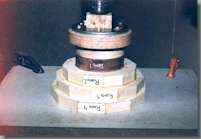
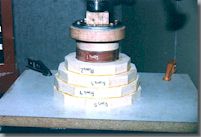
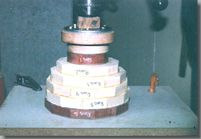
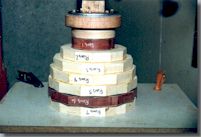
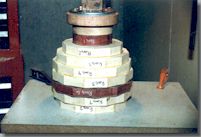
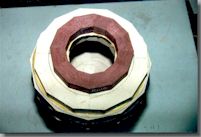
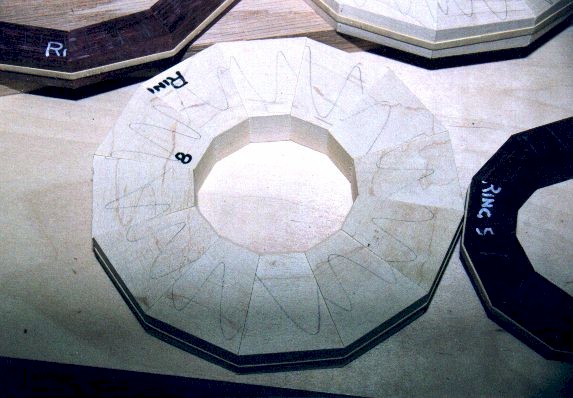
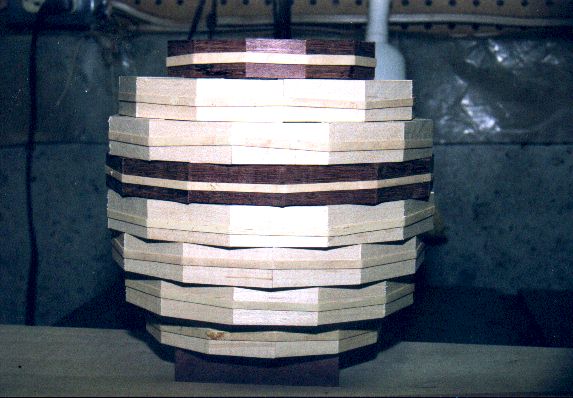
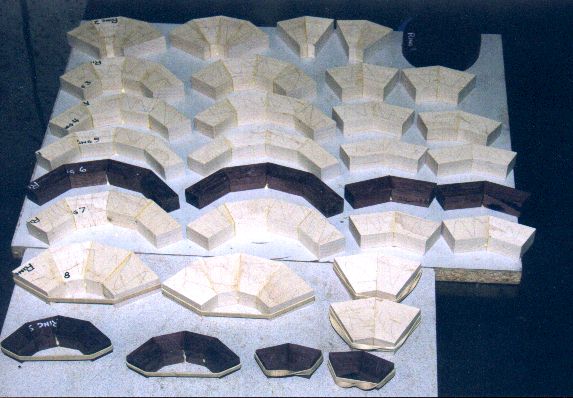
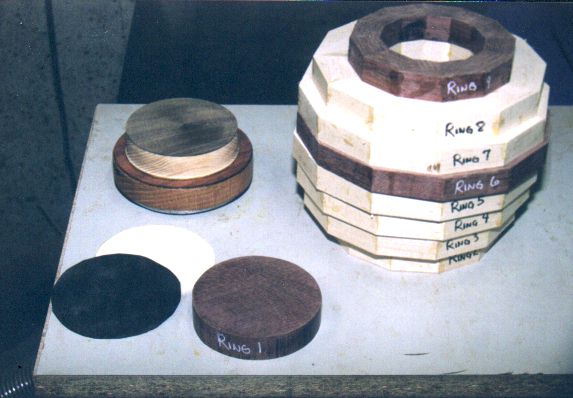
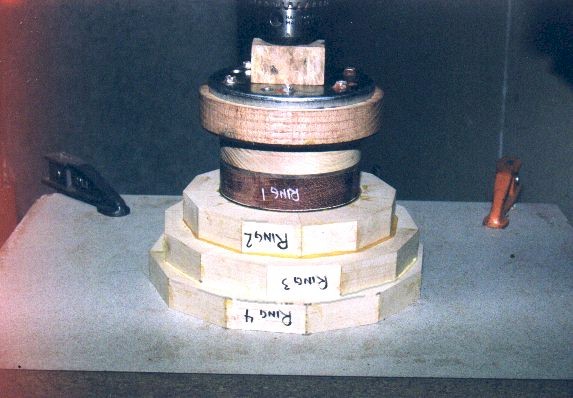
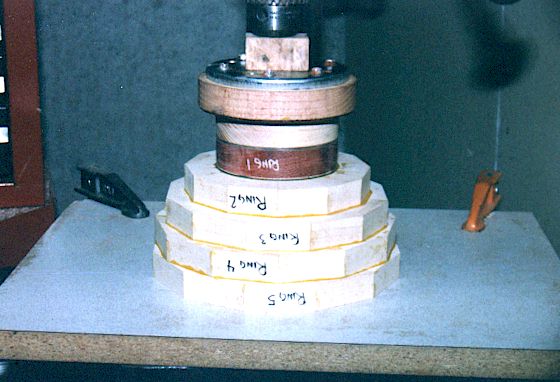
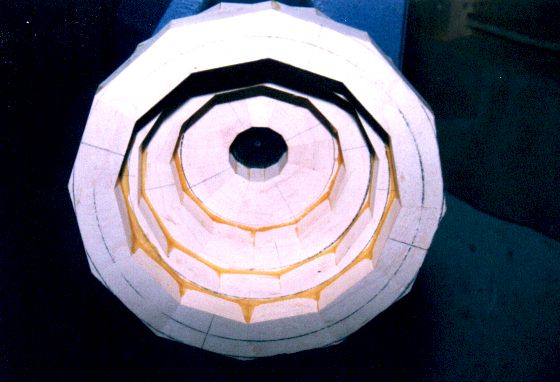
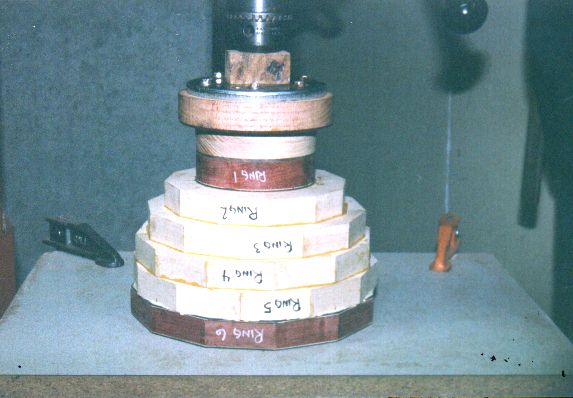
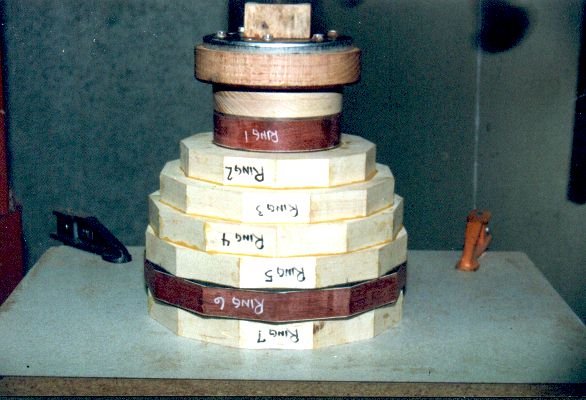
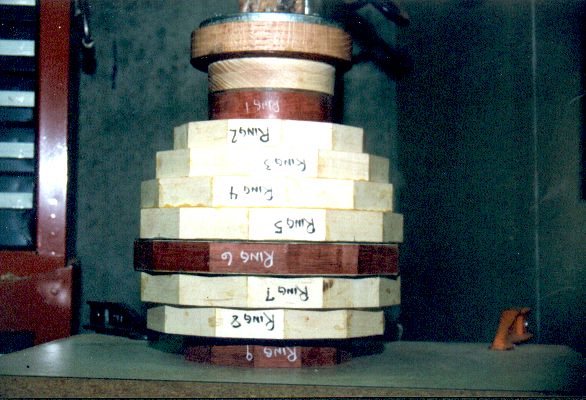
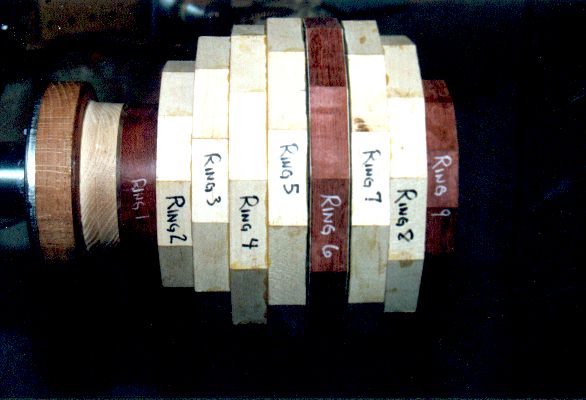
To show what all the segment rings look like at this stage, I
have rubber-banded all the cut segments together and stacked the rings
like they will look when glued. This is not a normal construction step.
Note that each ring is turned 1/2 segment from the ring below it.
|
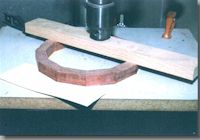
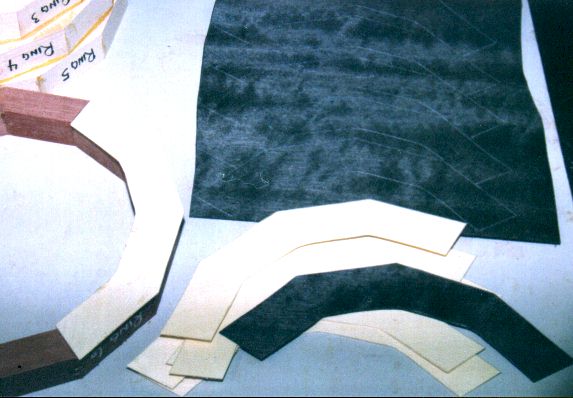
This is the waste wood left over from cutting the segments.
Since maple is cheap, I had cut all the maple segment boards the same
length of 22". If I had made the bowl from exotic wood, such as
cocobolo, I would have cut all the segment boards 1" longer than
the calculated Design sheet length.
|
| GLUING SEGMENTS: |
I used a clean and newly-sharpened sawblade so none of the
segments needed sanding. I have glued pairs of segments together. To
glue the segments, I spread glue evenly on the mating surface of one
segment, then mate the segments together, rubbing the segments together
to distribute the glue, then I set the segments down carefully on a
sink cutout. Glue doesn't stick to the formica on sink cutouts. If the
wood end grain seems to excessively absorb the glue then more glue
should be applied. In the photo above, I have rubber banded the
segments of rings #8 and #9. Rubber banding gives the tightest possible
joints. I usually only rubber band the most visible joints, like the
lip ring.
|
This photo shows segment pairs being glued together. For a
12-segment ring like this one, I don't glue all pairs together because
I want to end up with two half-rings. Later, I will sand the butts of
the half-rings to make the half-rings fit perfectly together.
|
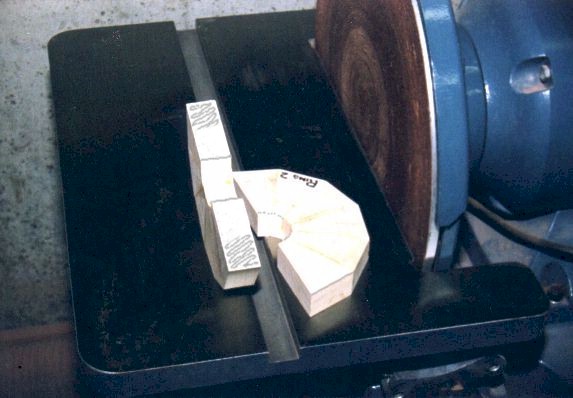
All of the half-rings have been made. Now it's time to sand
the ring butts. I use a 12" disk sander to sand the ring butts. I used
to use a 6"x48" belt sander to sand the ring butts. At one time I used
sticky-backed sandpaper attached to sink cutouts or glass sheet (very
flat) to sand the ring butts. I'm always on the lookout for easier ways
to do things.
|
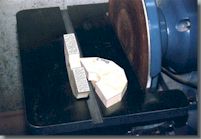
To keep from accidently sanding the ring butts too much, I put
pencil marks on the butts like in the photo above. The idea is that
when the pencil marks are just sanded off, the butt is flat.
Sometimes I rotate the sanding disk by hand when there's not much butt
material to sand off. Never oversand the butts. Oversanding will make
the ring oval, which can really badly affect bowl wall thickness.
|
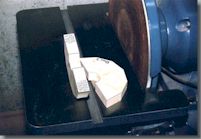
This photo shows the pencil mark is halfway sanded off. So,
there's a bit more sanding needed to flatten the ring butt. Every ring
butt should be pencil marked and sanded at this time.
|

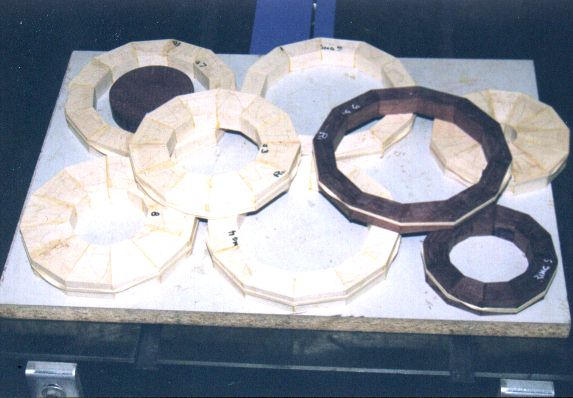
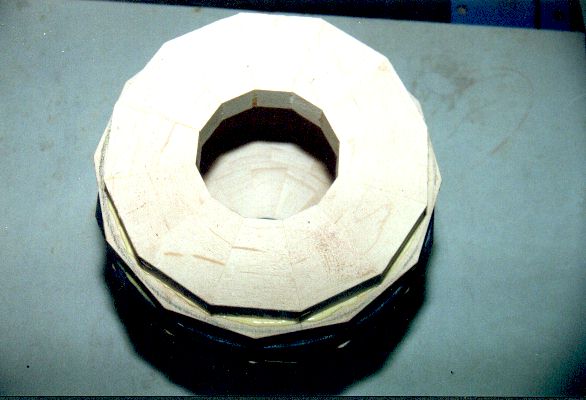
All the ring butts have been sanded. The half rings have been
glued and rubber-banded together.
|
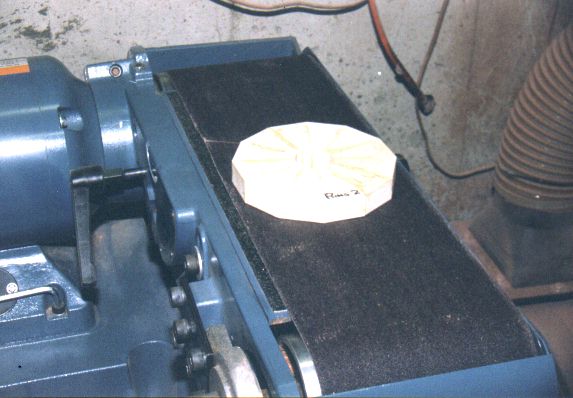
Now, one side of each ring should be sanded flat. Be careful
and don't oversand. One side of every ring should be sanded at this
time. The other side of the ring will be flattened on the lathe.
If you have a thickness sander, you can save time by using this tool to
flatten the rings.
|
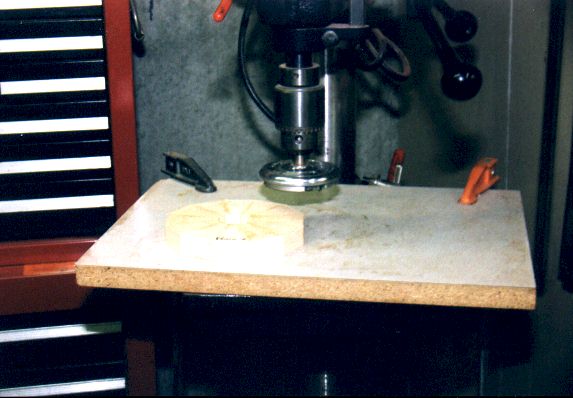
I sometimes use a Wagner Safety Planer (purchased at
Woodcraft Supply) chucked into my drill press to flatten the other side
of each ring. This operation also planes the ring sides parallel.
Sometimes I'll skip the planing step. Instead, I'll glue one ring at a
time onto the lathe faceplate and flatten the ring on the lathe. This
second method can make the bowl assembly process take longer, but if
I'm making several bowls at once (and I usually am), the total assembly
time for all bowls can be much less.
|
All of the segmented rings have now been flattened. The next
step is to glue the rings onto the faceplate.
|
|
| GLUING RINGS: |

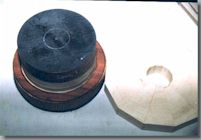
The faceplate I'm using for this project has lots of waste
wood on it, at least 4 pieces from past projects. When I cut a bowl off
the faceplate I always leave a little bit of the wood behind (for no
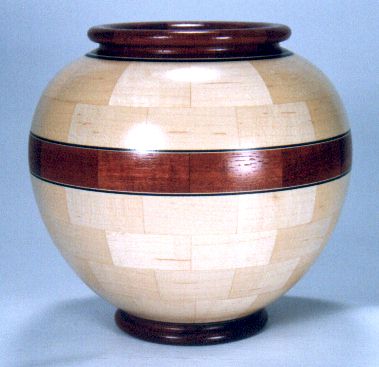
particular reason). To make the new bowl more interesting, I'm adding
contrasting veneer in four places (refer to the finished bowl at top of
this page) consisting of white and black veneers. I used my drill press
as a veneer press for gluing.
|
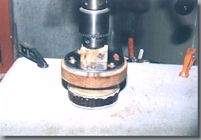
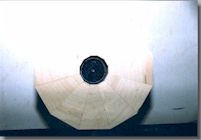
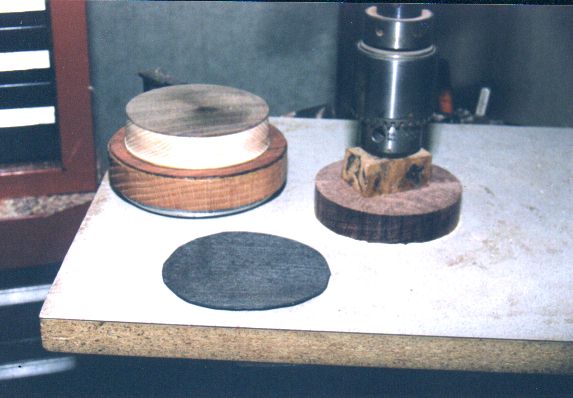
The purpleheart base disk is being glued to the faceplate. The
white and black veneer pieces have already been glued to the base disk.
|
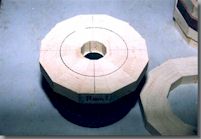
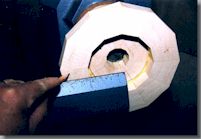
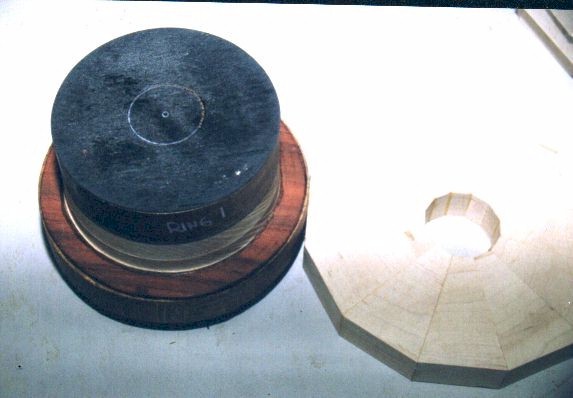
I have turned the base disk (ring #1) round in the lathe. The
next step is to attach ring #2 to the base disk. To center ring #2 on
the base disk, use the following procedure: 1) Measure the smallest
inside diameter of ring #2. 2) Spin the base disk on the lathe
and draw a circle on it about 1/8" smaller diameter than the ring #2
inside diameter dimension. 3) go to next photo.
|
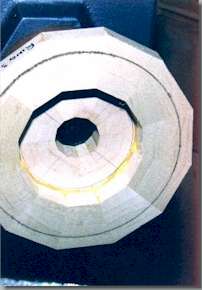
3) Test fit ring #2 and the base disk. Use the circle on the
base disk to center ring #2 by eye. The circle on the base disk should
be smaller than the ring #2 inner diameter so that the circle mark is
not obscured by glue oozing out from under ring #2. If everything looks
good then glue ring #2. After gluing two rings together, before I clamp
the rings, I usually let the glue set up for a few minutes so the rings
don't shift.
|
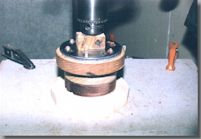
Ring #2 is being glued to the base disk. If you're really
nervous about the rings moving, wait a few minutes after clamping to
check ring alignment. You should still be able to get the rings apart,
although you might need to use a sharp chisel to break the glue bond.
|
The next step is to attach ring #3 to ring #2. This step is
nearly identical to the previous step (ring #2 to base disk): 1)
Measure the smallest inside diameter of ring #3. 2) Spin ring #2
on the lathe and draw a circle on it about 1/8" smaller diameter than
the ring #3 inside diameter dimension. 3) Ring #3 needs to be
turned 1/2 segment rotation from ring #2 so the split lines of the ring
#2 segments are in the middle of the ring #3 segments. So, make a
pencil mark halfway across two segments on ring #2, on opposite sides
of the ring from each other. Two corners of ring #3 will be lined up
with the pencil marks. 4) Test fit ring #2 and ring #3. Use the
circle on ring #2 to center ring #3 by eye. If everything looks good
then glue ring #3 like the previous ring.
|
This photo is supposed to show ring #3 centered on the pencil
circle on ring #2. Even if the photograph doesn't show it, ring #3 is
centered.
|
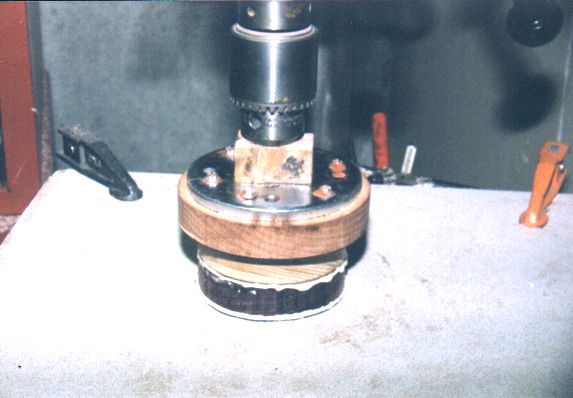
This next operation need to be performed after every few rings
are glued on. If you don't safety plane each ring, then this step must
be performed after every ring is glued on. This step is called face
flattening and runout correcting. If the face is obviously not flat,
such as if it has not been safety planed, then go ahead and flatten the
surface. I use a skew like a scraper and check it with a scale. If you
are uncertain of the ring flatness or face runout, then set up the tool
rest and pencil (not touching yet) like the photo, turn the lathe on to
high speed and lightly touch the pencil to the ring face.
|
If the ring is perfectly flat and has no face runout, then the
pencil mark will be a complete (or nearly complete) circle. If the ring
needs cutting then the pencil mark will be a short arc, like in the
photo above. From this photo, ring #3 needs to be cut. If you don't
make this ring face correction every few rings, by the time you get to
the lip ring, the runout problem may be exaggerated and you might be
unhappy with the results. This ring face correction usually takes only
a few minutes to perform.
|
This photo shows ring #3 face has been flattened and the face
runout corrected. The pencil mark on the ring face is a nice circle.
|
Ring #4 has been centered to ring #3 and glued on. It was
centered using the same method as ring #2 to ring #3.
|
Ring #5 has been centered to ring #4 and glued on. It
was centered using the same method as ring #2 to ring #3.
|
The face of ring #5 is being flattened using the same
procedure as with ring #3. The pencil mark is a nice circle.
|

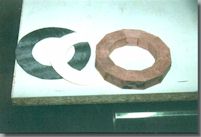
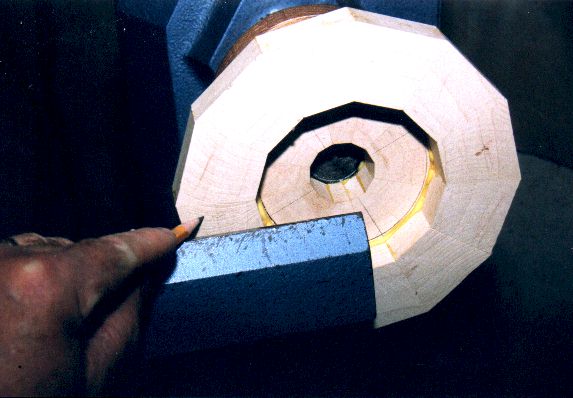
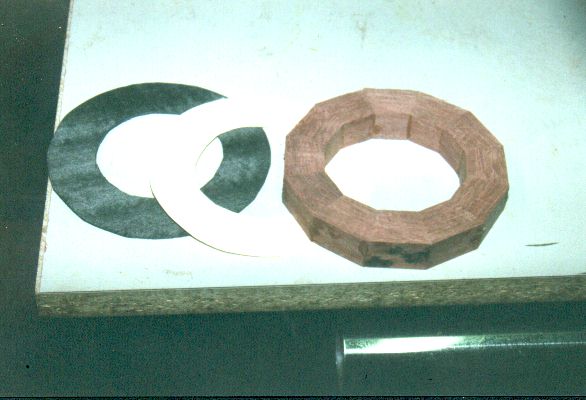
I am cutting pieces of of white and black veneer that go above
and below the purpleheart central ring (ring #6). I could have cut
veneer rings for this step because my veneer was wide enough, but I
wanted to show that veneer can be economically cut, when the ring is
much larger than the veneer width. I used ring #6 to make a template
for cutting a veneer piece which spans 4 segments of the 12 segment
ring. For some very big segmented rings, I will make a template that
spans 3 segments of a 12 segment ring to avoid waste.
|
The veneer pieces are being glued to ring #6 using the drill
press as a veneer press. The veneer can be glued on ring #6 ahead of
time.
|
Ring #6 has been centered to ring #5 and glued on. It
was centered using the same method as ring #2 to ring #3.
|
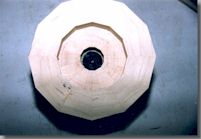
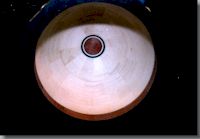
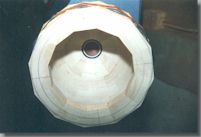
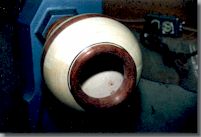
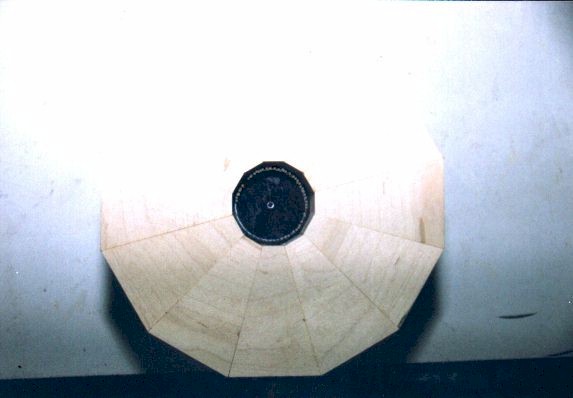
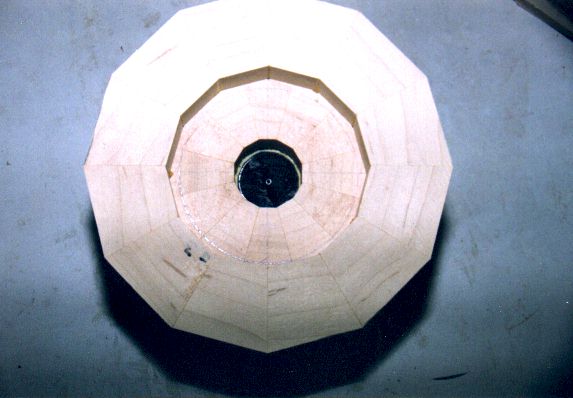
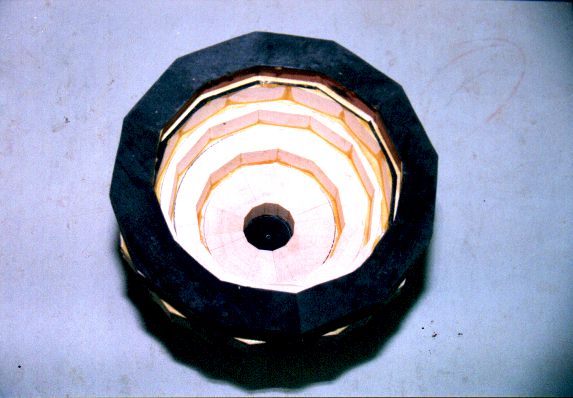
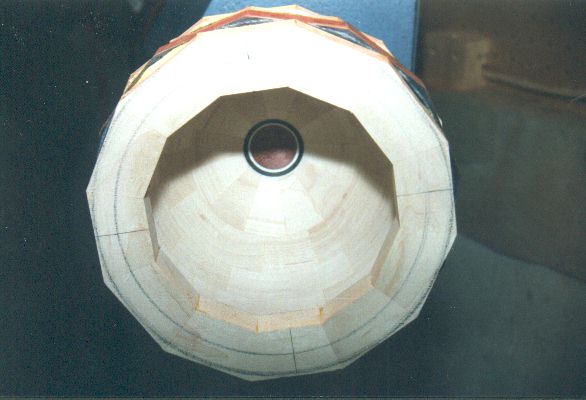
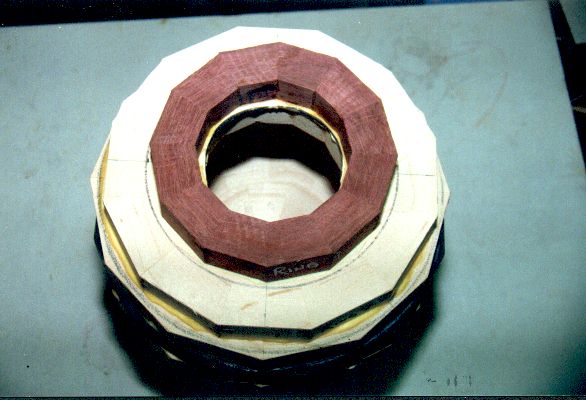
This photo shows the inside of the new bowl after gluing ring
#6. I usually pre-turn the inside of the bowl at this point, just to
get the inside smooth. It would be difficult to reach way down into a
deep bowl and smooth the segments after the bowl has been completely
assembled. This cutting is not for bowl wall thickness. Later, I'll cut
the inside of this part of the bowl to get my desired bowl wall
thickness.
|
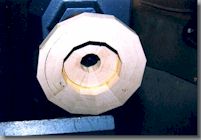
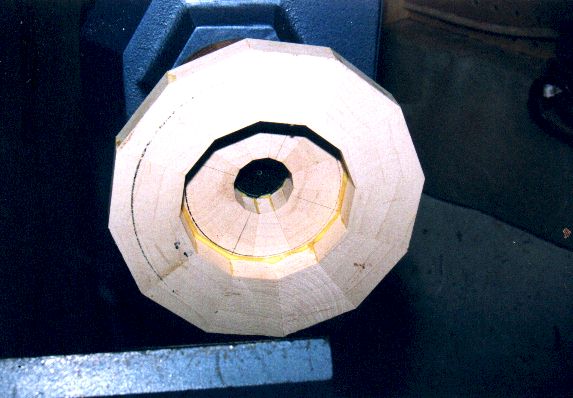
The inside of the bowl has been turned smooth on the lathe. I
used a Robert Sorby RS-2000 lathe tool. It probably would have been
possible to use a bowl gouge but I don't have one with the correct
grind. This area will be turned again so I didn't bother sanding. The
flat areas have just barely been cleaned up. No extra wood has been
removed because the bowl might be structurally weakened. It's difficult
to see in this photo, but a pencil mark has been made on the face on
the black veneer in ring #6 that will be used to center ring #7. On
dark woods I use a silver pencil to make the mark easier to see.
|
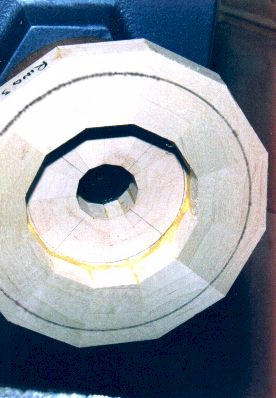
Ring #7 is being glued to ring #6, using the pencil mark on
ring #6 for centering.
|
There are two pencil marks on ring #7. The inner mark is a
check for ring face flatness and runout. The outer pencil mark will be
used to center ring #8.
|
Ring #8 centering is being checked prior to gluing to ring #7.
|
Ring #8 is being glued to ring #7, using the pencil mark on
ring #7 for centering.
|
White and black veneer has been cut for the lip ring (ring #9).
|
The drill press veneer press was in use so I used this
alternate method of clamping the lip ring veneer.
|
The lip ring (ring #9) centering is being checked prior to
gluing to ring #8.
|

Ring #9 is being glued to ring #8, using the pencil mark on
ring #8 for centering.
|
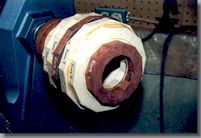
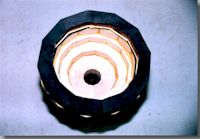
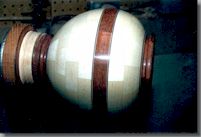
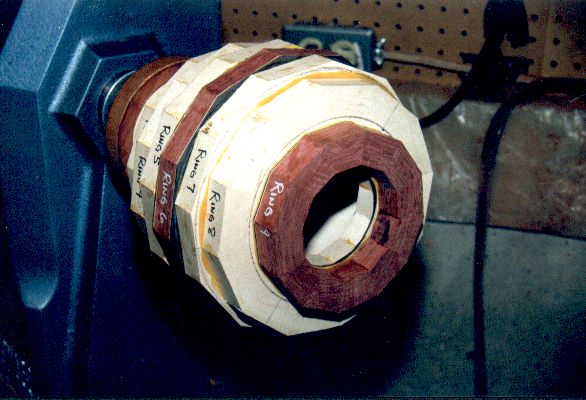
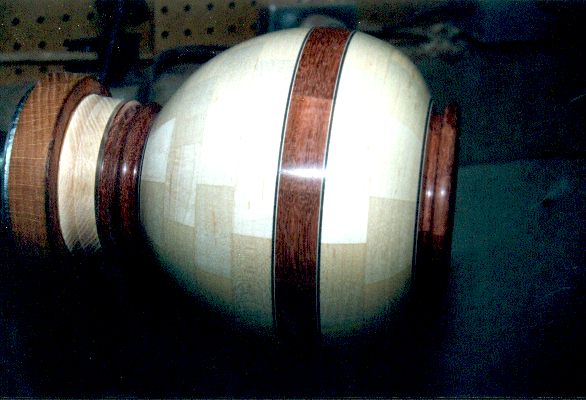
The entire bowl assembly has now been glued. The outside
surface is ready to be lathed smooth.
|
Another view of the bowl assembly.
|
The outside of the new bowl has been turned smooth. I used a
3/4" diameter bowl gouge to rough turn the outside. Then I used several
different sizes of skews to finish turn the outside. I always
completely turn the bowl outside surface before I go on to the inside.
Sometimes, at this point, I will also finish sand.
|
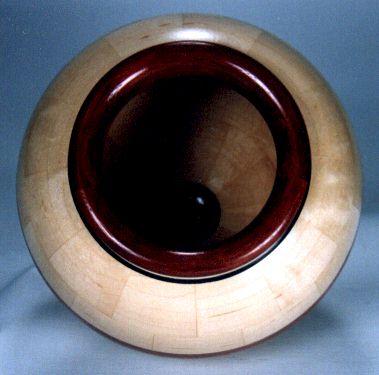
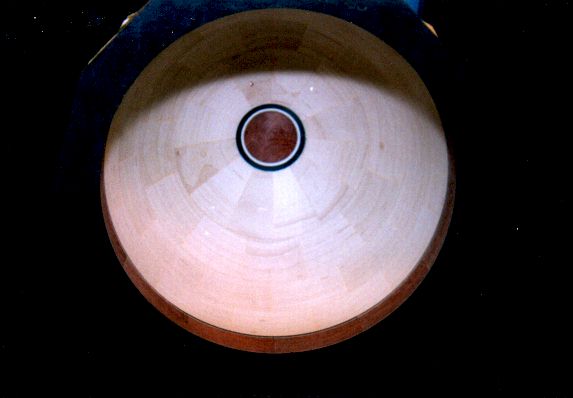
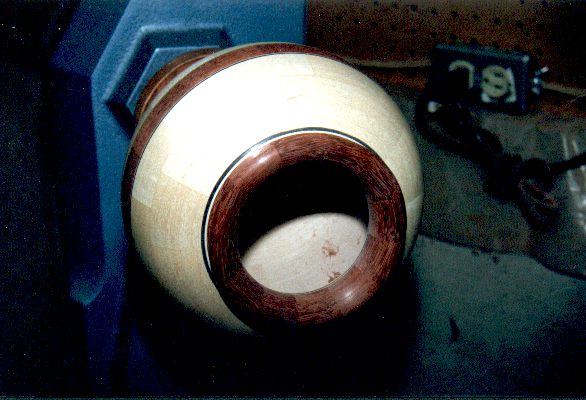
The inside of the new bowl has been turned smooth in this
photo. I started at the top of the bowl, turning the bowl to final wall
thickness of 3/16" to 1/4", and worked my way to the bottom. If you
work from the bottom upwards, the bowl will probably break off the
lathe because it will be too weak to sustain rought turning at the top.
After finish turning the bowl inside, I sanded the entire bowl and
parted it off the lathe at the base using a parting tool. I sanded the
base parting using my 6"x48" belt sander and by hand sanding. The bowl
was finished using one coat of Behlen's spray sanding sealer, followed
with several coats of Behlen's Jet Spray lacquer. The next day, I hand
rubbed the finish using Deluxing Compound and polished with Renaissance
Wax.
|


