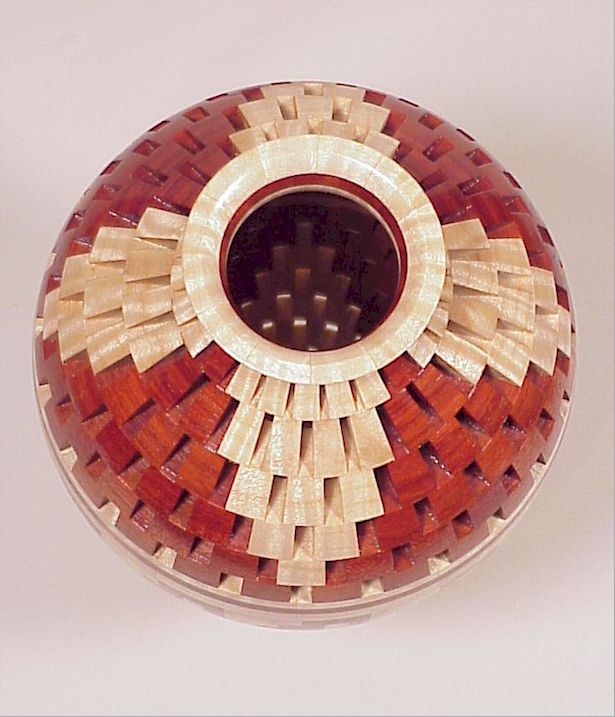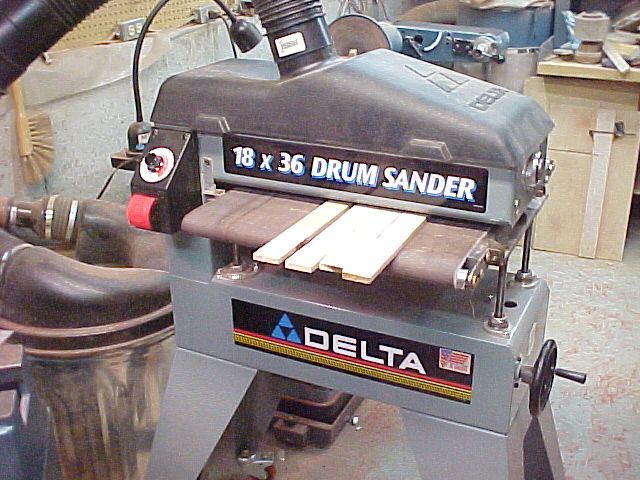
There are a number of different ring thicknesses on this vase:
3/8", 5/16", 1/4" and 1/8". I thought that the vase would be much
easier to assemble if the segments were accurately
thicknessed. I used my bandsaw to rough resaw the lumber,
then I used my thickness planer to finish thickness.
|
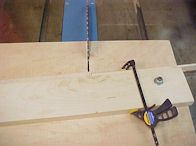
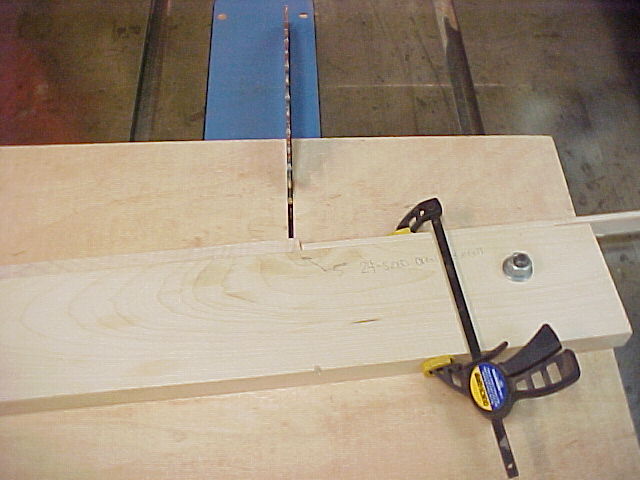
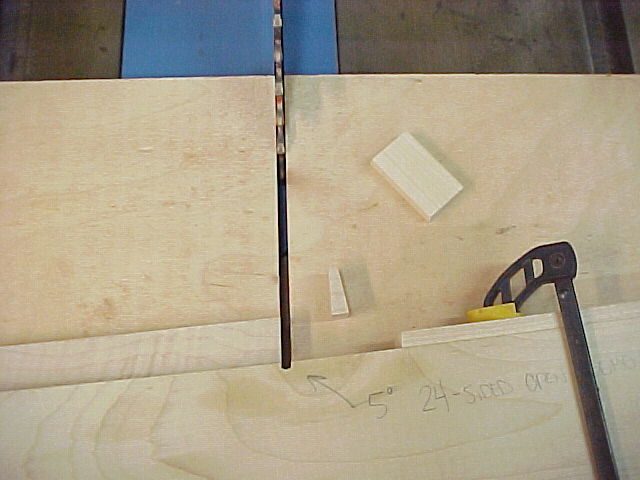
This is the frame-miter table saw sled I used to cut all the
segments for this bowl. The sled plans are found on another page
on this website (click here). Before
making any saw cuts I made sure that my table saw blade was perfectly
vertical, which is very important. The open segments were all cut
at 5 degrees. The closed segments were all cut at 15
degrees.
|
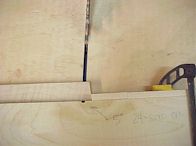
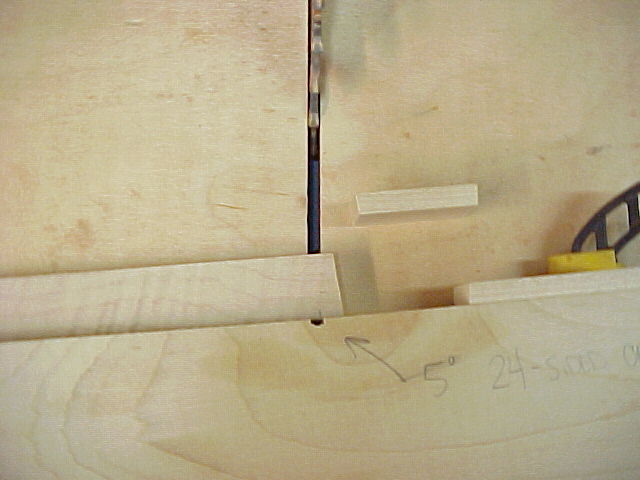
The open segments for this vase are extremely small, some are
less that 1/4" wide, which are difficult and maybe even dangerous to
clamp when cutting off. For cutting all of the open segments I
used a two-part stop board. The right-hand section of stop is
clamped into place after the segment cutting distance has been
set. Then the left-hand stop section is removed (see next photo).
Note that during a cut, there is a tendency for the saw blade
to push the segment board to the left, making a wavy cut. The
segment board can be clamped to prevent its movement during the
cut. Gluing a strip of fine sandpaper to the fence edge will help
hold the segment board in place if clamps are not used.
Always make sure there's no chips or sawdust between the
segment board and the stop board or fence.
|
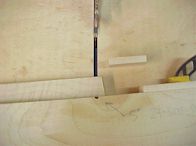
The left-hand stop section has been removed, creating a gap
between the segment board and the right-hand stop section.
|

The segment has been cut off. Because the segment is not
against the stop, the wind from the blade blows the segment away from
the blade. If I did not use a two-part stop board, the cutoff
segment is so light that it would bounce around and probably bounce
into the spinning blade, damaging the cutoff segment and maybe zinging
it back into the operator.
|
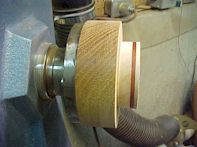
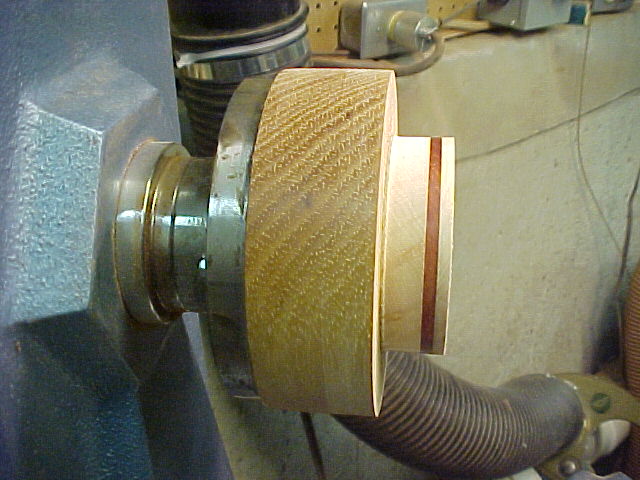
The base for the vase has been made and glued onto a faceplate
with waste block. When the vase is complete, I will part off the
vase from the waste block.
|
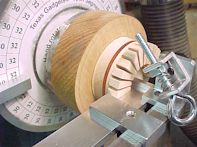
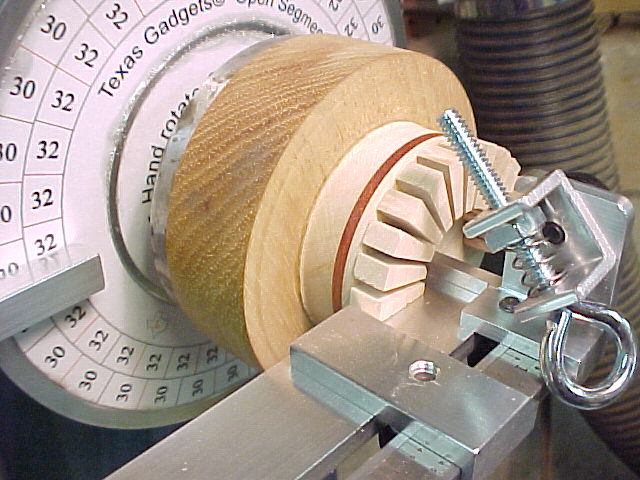
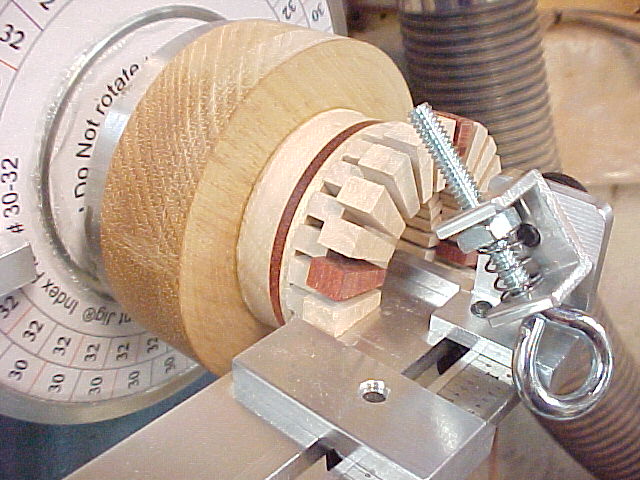
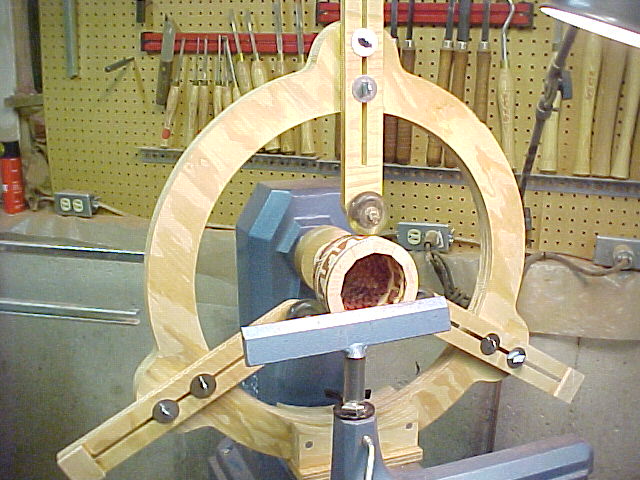
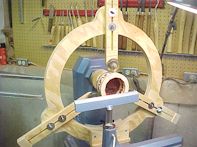
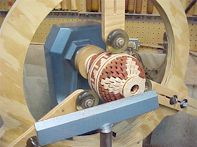
I have installed the Open Segment Jig. The index wheel
was screwed onto my headstock threads and the faceplate was screwed
on. The Jig consists of two stands. The rear stand is used
to set the index wheel at the appropriate angle. The front stand
provides a platform and a stop for gluing on the segments at the
correct diameter.
The spring plunger, attached to the front stand, is designed
to hold each segment tight for 10 to15 seconds while the glue sets
up. I found that the spring plunger wasn't very useful on my tiny
segments, so I didn't use it. It would probably work just fine on
a bowl using larger segments. Instead, I just held the segments
in place using the end of a mechanical pencil.
|
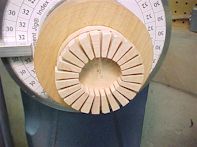
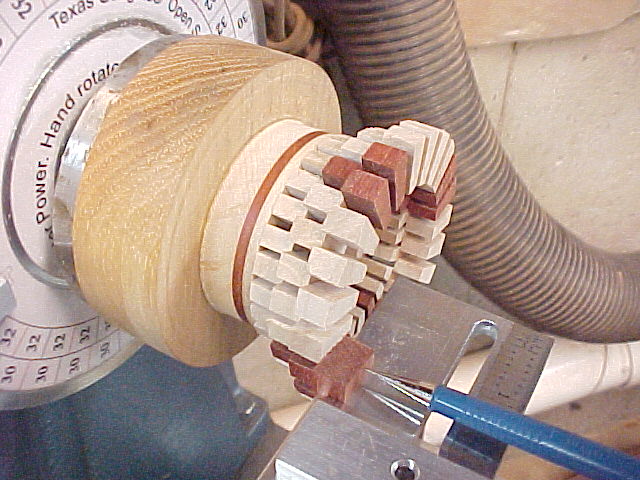
The first row of open segments has been glued on.. After
drying for about an hour, I lightly sanded flat the face of the segment
ring with the lathe off, using a sanding block and 80-grit
sandpaper.. While I waited for the segment's glue to dry, I cut
the next row of segments.
It took longer to cut and sand the segments than to glue them
onto the faceplate. The Jig really worked.
I use a very light coat of Titebond II glue on each open
segment. You can see through the glue coat. Almost no glue
squeezes out between the segments. I got a bit overzealous in
gluing a few segments, so I used a pipe cleaner to remove the excess
glue. Titebond II glue dries clear and shiny so all visible glue,
as long as it wasn't a big gob, was invisible after I lacquered the
vase.
|

The second row of open segments is being glued on. I
think I removed the spring plunger at this point to get it out of the
way.
|
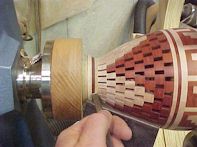
The third row of opne segments is being glued on. Note
the stop positions the segment at the correct diameter. Chuck
Hale has imbedded a ruler in the platform surface to make positioning
the stop very quick. I am holding the segment while the glue sets
up using my mechanical pencil.
|
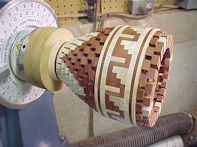
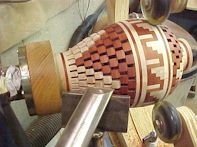
The fifth row of open segments is being glued on. The
design is starting to take form.
|
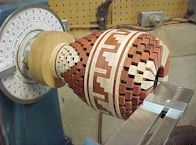
The seventh row of open segments has been glued on. Note
how I'm using my sanding block to make sure that the top of the ring is
flat. Because I thickness sanded my segment boards, there isn't
much to sand.
|
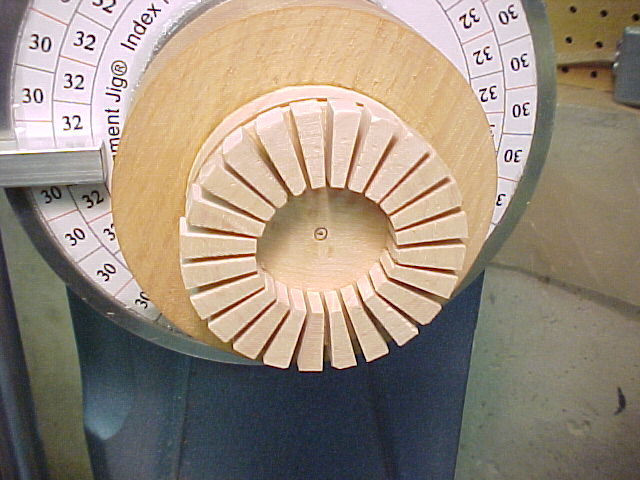
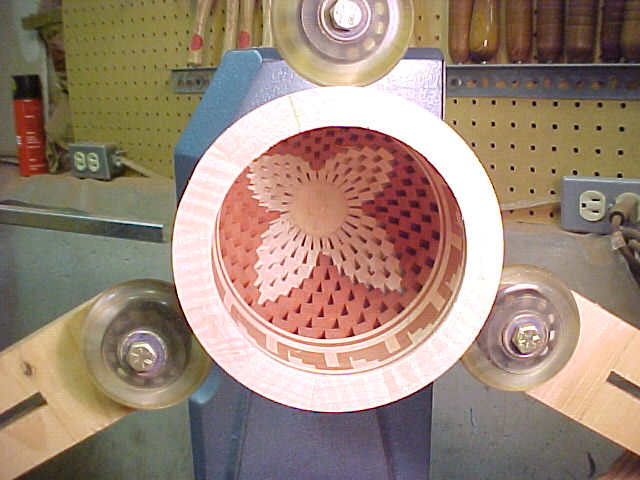
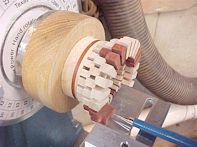
The eighth row of open segments and the central ring has been
glued on. I have removed the Open Segment Jig. I want to
lathe the inside of the vase now, while I don't have very far to reach
inside. Since I'm unsure how strong the vase is, I decided to
lathe smooth the central ring and install my steady rest so there will
be little stress on the vase when I lathe the inside. To lathe
the outside of the central ring I used a very sharp skew as a
scraper. Skews used like this, on the outside of segmented bowls,
are very good because the grain direction is all the same and they
leave a very fine surface finish.
|
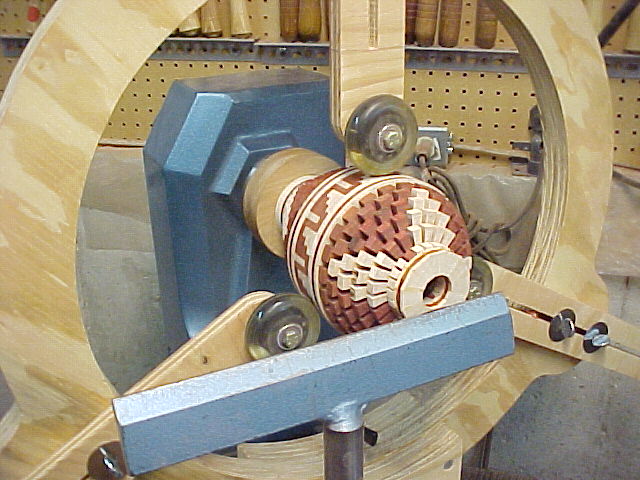
I have installed my steady rest and the vase inside is ready
for lathing.
|

I used my Sorby RS2000 with a sharp teardrop-shaped scraper to
cut the inside of the vase.
|
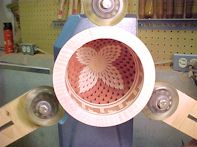
The vase inside has been lathed smooth.
|
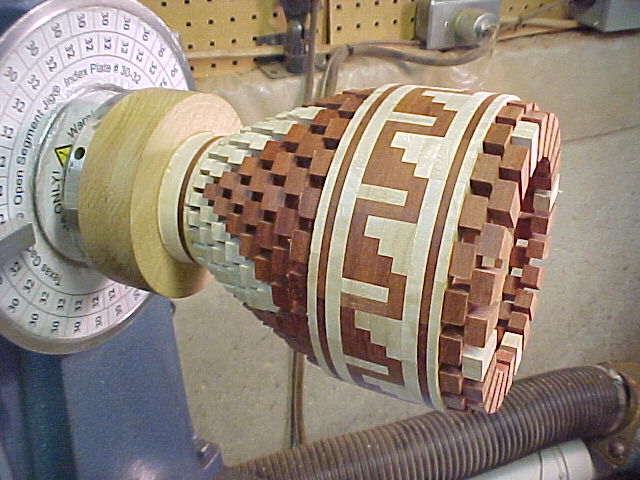
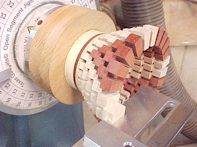
The tenth row of open segments has been glued on.
|
The twelfth row of open segments is being glued on
|
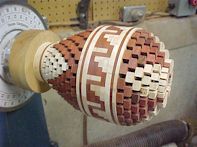
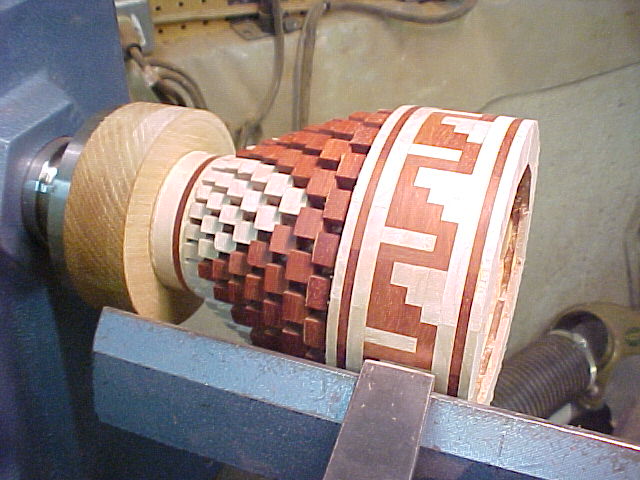
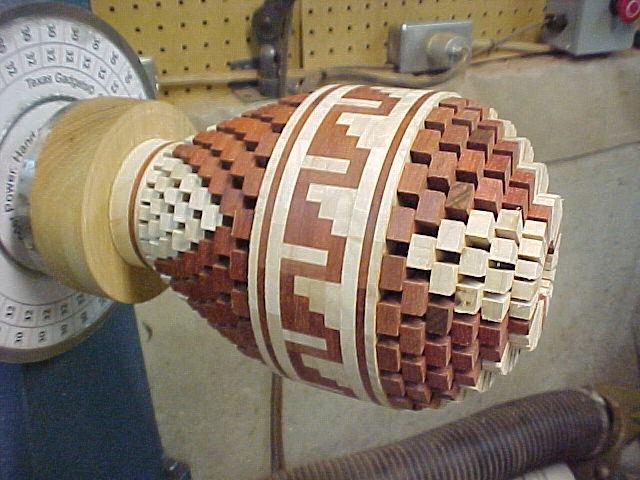
The final row of open segments has been glued on.
|
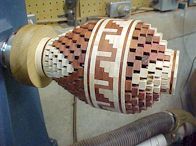
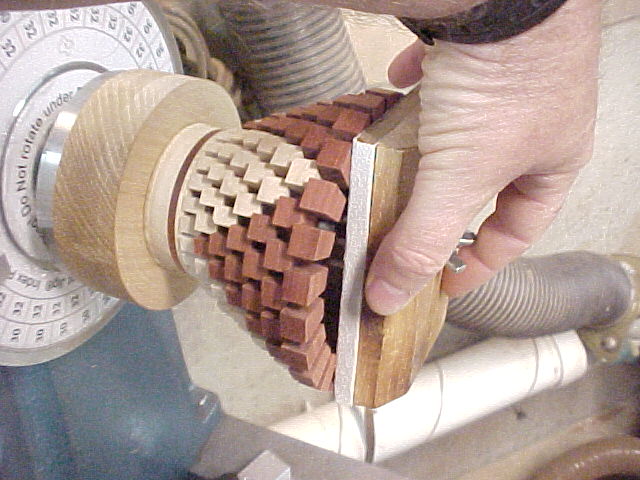
I have remove the Open Segment Jig, including the indexing
ring, and installed the vase's lip section.
|
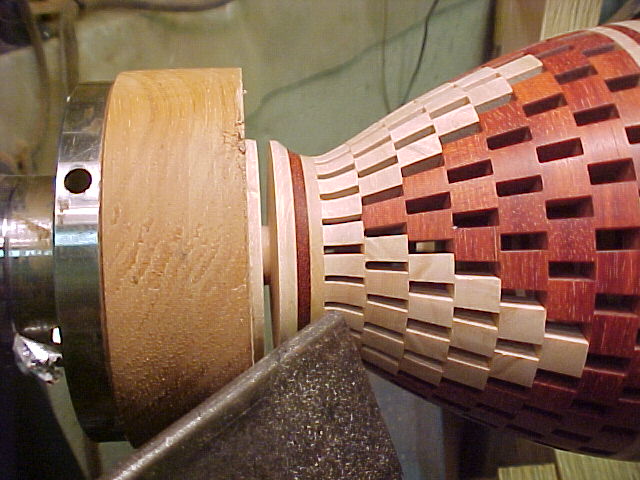
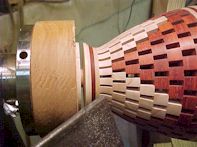
The steady rest was reinstalled the for the remainder of the
vase lathing. The next part to lathe is the remaining vase
interior.
|

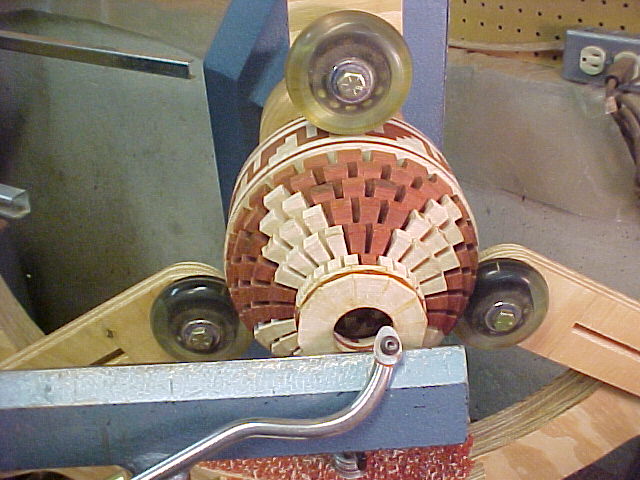
I used a small Sorby crookneck scraping tool with a sharp
teardrop scraper to cut the interior. This tool is really only
adequate for cutting a few inches beyond the tool rest, but that's all
I have to do. It does a nice job with no sanding necessary.
|
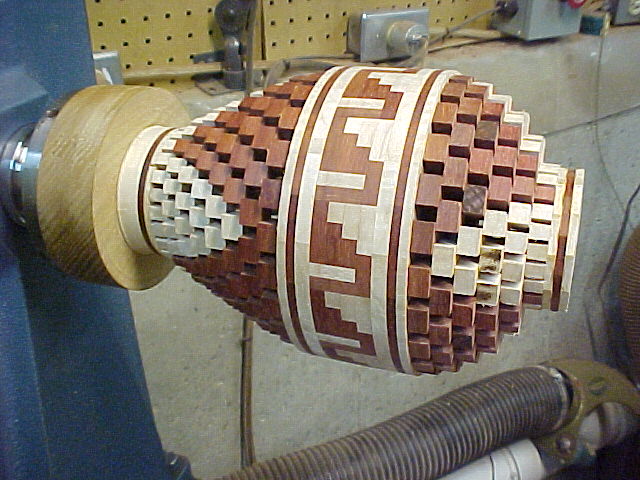
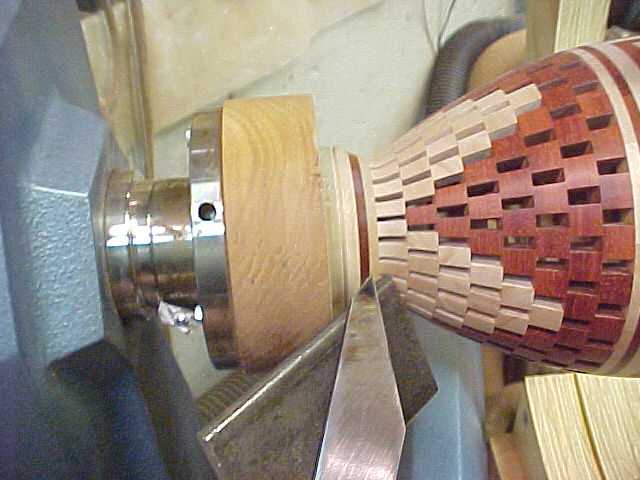
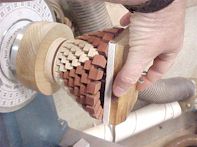
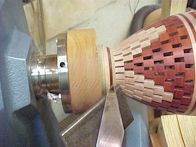
With the inside of vase complete, I used a sharp skew, held
horizontally like a scraper, to cut the outside of the vase.
Since the skew is cutting thin shavings there is no problem with
shavings going under the steady rest rollers.
|
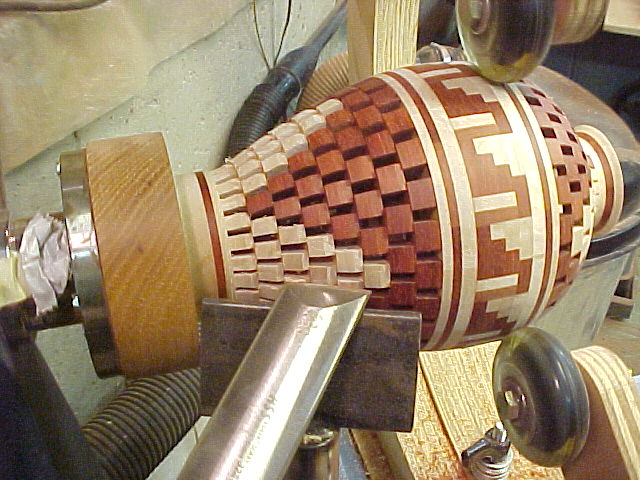
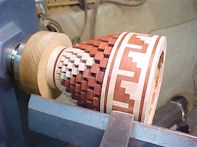
A small skew and small spindle gouge were used to shape the
vase's lip and base.
|
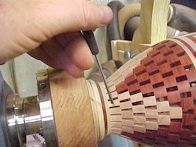
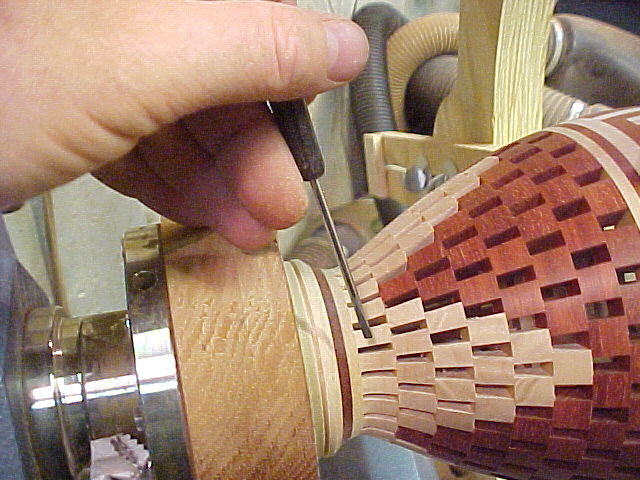
This small screwdriver and an even smaller one was used remove
the remove the shavings from between the open segments.
Compressed air did a pretty good job of getting out most of the
shavings.
|
The vase was sanded up to 320-grit sandpaper followed with a
sanding using a maroon scotch brite pad. Scotch brite is
color-coded for abrasiveness. I think maroon is "medium".
The next step was to part the vase off the faceplate. I
used the above Sorby parting tool.
|
I parted the base until I had a 1/2" ligament, which is shown
in the photograph. With the lathe off, I hand sawed through the
ligament. Then, I reverse turned the remaining stub off the vase
base.
|
|